- Tunisuino
- Using a TPLINK router as an Ethernet / Wifi shield
Using a TPLINK router as an Ethernet / Wifi shield
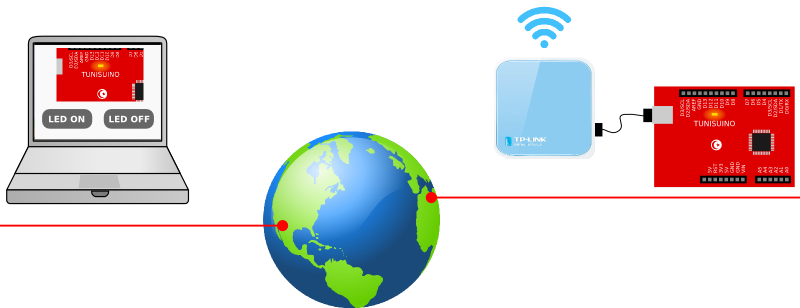
In this tutorial, we will use a TPLINK router to connect the Tunisuino to the internet. These are very low cost routers, we got one at 50 TND. They are usually marketed as 3G traveler routers but we will show you how to use it to control the Tunisuino from across the globe using an ethernet or wifi connection.
There are two models available in Tunisia. You can choose either one, the hardware seems to be the same :
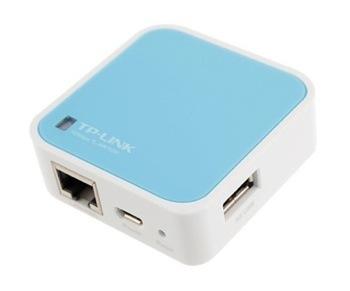
The first is the tiny TL-WR703N (5.7 x 5.7 x 1.8 cm)
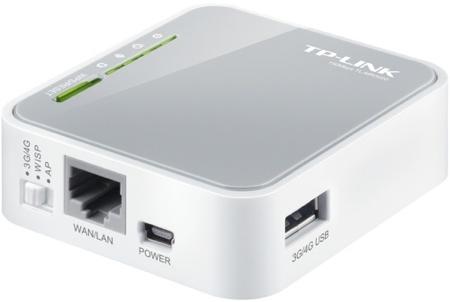
The second is the TL-MR3020, a little bigger with more leds and buttons (6.7 x 7.4 x 2.2 cm)
These routers feature a USB host, wifi and an ethernet port. We will use the usb port to connect the Tunisuino to the router. We can then connect the router to our local network either via ethernet or wifi.
But before that, we need to install linux on the router so that we can hack around. This is a simple process since there is already a linux distribution called OpenWRT that have been ported to these routers.
Installing OpenWRT on the router :
- Download OpenWRT for the WR703N model or the MR3020 one.
- Connect the router to your computer via an ethernet cable and power it up.
- In your web browser, type the router IP address. (192.168.1.1 for the WR703N and 192.168.0.254 for the MR3020)
- Login to the router web interface. (default login: admin/admin)
- Upgrade the firmware with the downloaded binary.

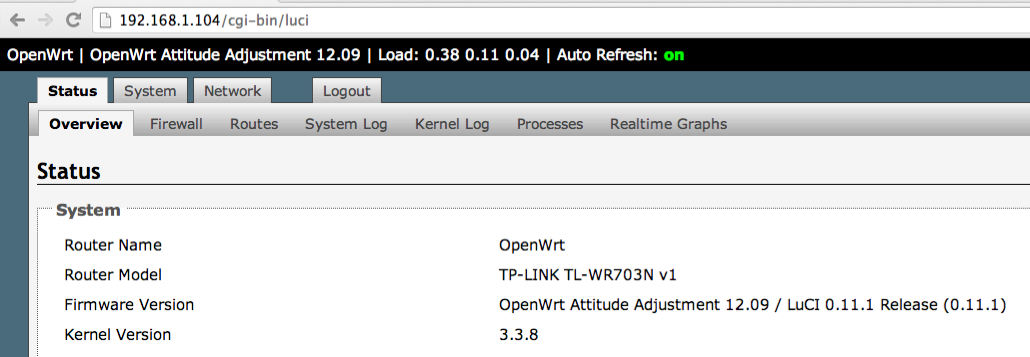
Once done, type in your browser 192.168.1.1 and check that OpenWRT has been installed successfully. You can then go to the Network tab to enable wifi and set the IP address according to your local network settings.
The network configuration depends on your local network. If you have a wifi protected network go to the Network tab and set the right SSID and password. And if you have a wired network connect an ethernet cable to the TPLINK router and check that you are still able to access the web interface from your computer. (the IP address might change, you can check it from your home router)
By now, you have the TPLINK router connected to your local network and you are able to access the OpenWrt web interface from your computer. So let's move to the Tunisuino.
Installing the Tunisuino driver :
To be able to communicate with the Tunisuino, you need to install a driver :
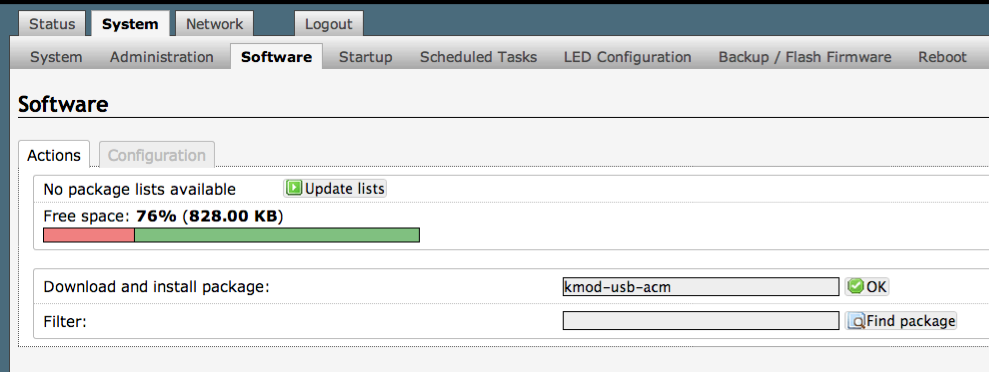
- Go to the Software tab under the System section.
- Click on Update lists.
- Install kmod-usb-acm.
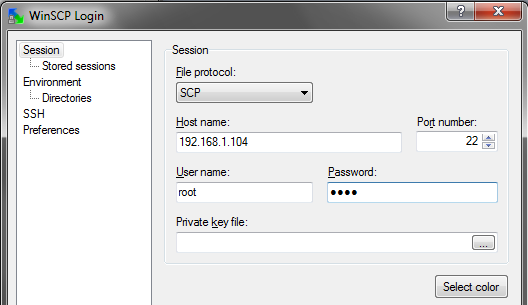
At this step, we need to access the router's filesystem. If you are using Windows you need to install WinSCP on your computer. And if you are using Linux or Mac OS you can use SSH from command line.
You can then login on port 22 as a root user :
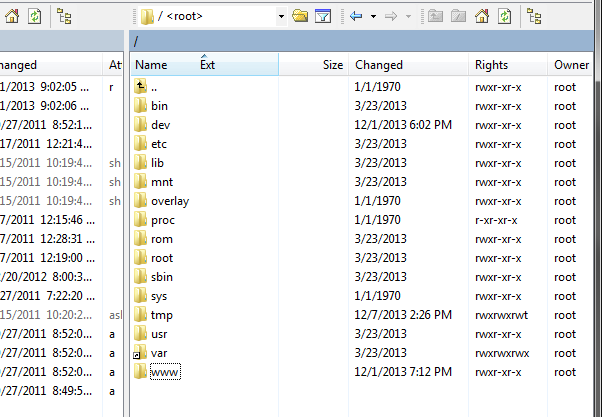
You have now a complete access to the router filesystem. You can add files, edit them and so on.
The filesystem should be familiar to linux users since this is a linux system after all :
A demo application :
To test our system we will setup a basic application. We will make a web page named led.html with two buttons, one to turn a LED on and the other to turn it off. On the Tunisuino, we will use the onboard LED connected to Port 13.
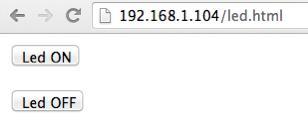
We need to write a basic HTML page that contains two buttons. When a user clicks on the Led ON button, we execute a script that turns the Led on, and when the Led OFF is clicked we execute another script that turns it off.
To do that, create a new file in the /www directory named led.html and put in it the following code :
<html>
<head>
</head>
<body>
    <form action="cgi-bin/led_on.cgi" method="post">
        <input type="submit" value="Led ON"/>
    </form>
    <form action="cgi-bin/led_off.cgi" method="post">
    	<input type="submit" value="Led OFF"/>
    </form>
</body>
</html>
We need then to create the two scripts led_on.cgi and led_off.cgi and put them in /www/cgi-bin. Make sure to set them as executable via their +x flag in their file permissions.
/www/cgi-bin/led_on.cgi :
#!/bin/sh
echo 'A' > /dev/ttyACM0
/www/cgi-bin/led_off.cgi :
#!/bin/sh
echo 'B' > /dev/ttyACM0
As you see, these are very simple scripts that just send the 'A' or the 'B' character to the serial port /dev/ttyACM0. And as you might guess, this is the virtual serial port of the Tunisuino. So when someone clicks on the Led ON button from his web browser the router sends 'A' to Tunisuino via its serial port and when the Led OFF is clicked the Tunisuino gets 'B'.
What remains now is to tell the Tunisuino when you get 'A' turn Port 13 on and when you get 'B' turn it off :
void setup() {
  pinMode(13, OUTPUT);
  Serial.begin(9600);
  while(!Serial);
}

void loop() {
  if (Serial.available() > 0) {
    int cmd = Serial.read();
    if (cmd == 'A')
       digitalWrite(13, 1);
    else if (cmd == 'B')
       digitalWrite(13, 0);
  }
}
So finally you can control the LED from your web browser using a low cost yet a very powerful solution. You can even access the led.html page from outside your home, from work or from other country. You only need :
- a device with an internet access. (computer, tablet, smartphone...)
- to know your IP address. (use sites like www.whatismyip.com)
- to forward the 80 port in your home router to the TPLINK router.
In this tutorial we have used a simple LED but you can virtually control anything from your garage door to your home lights to anything that runs on electricity, and with the power of a linux system connected to the Tunisuino, sky is the limit !